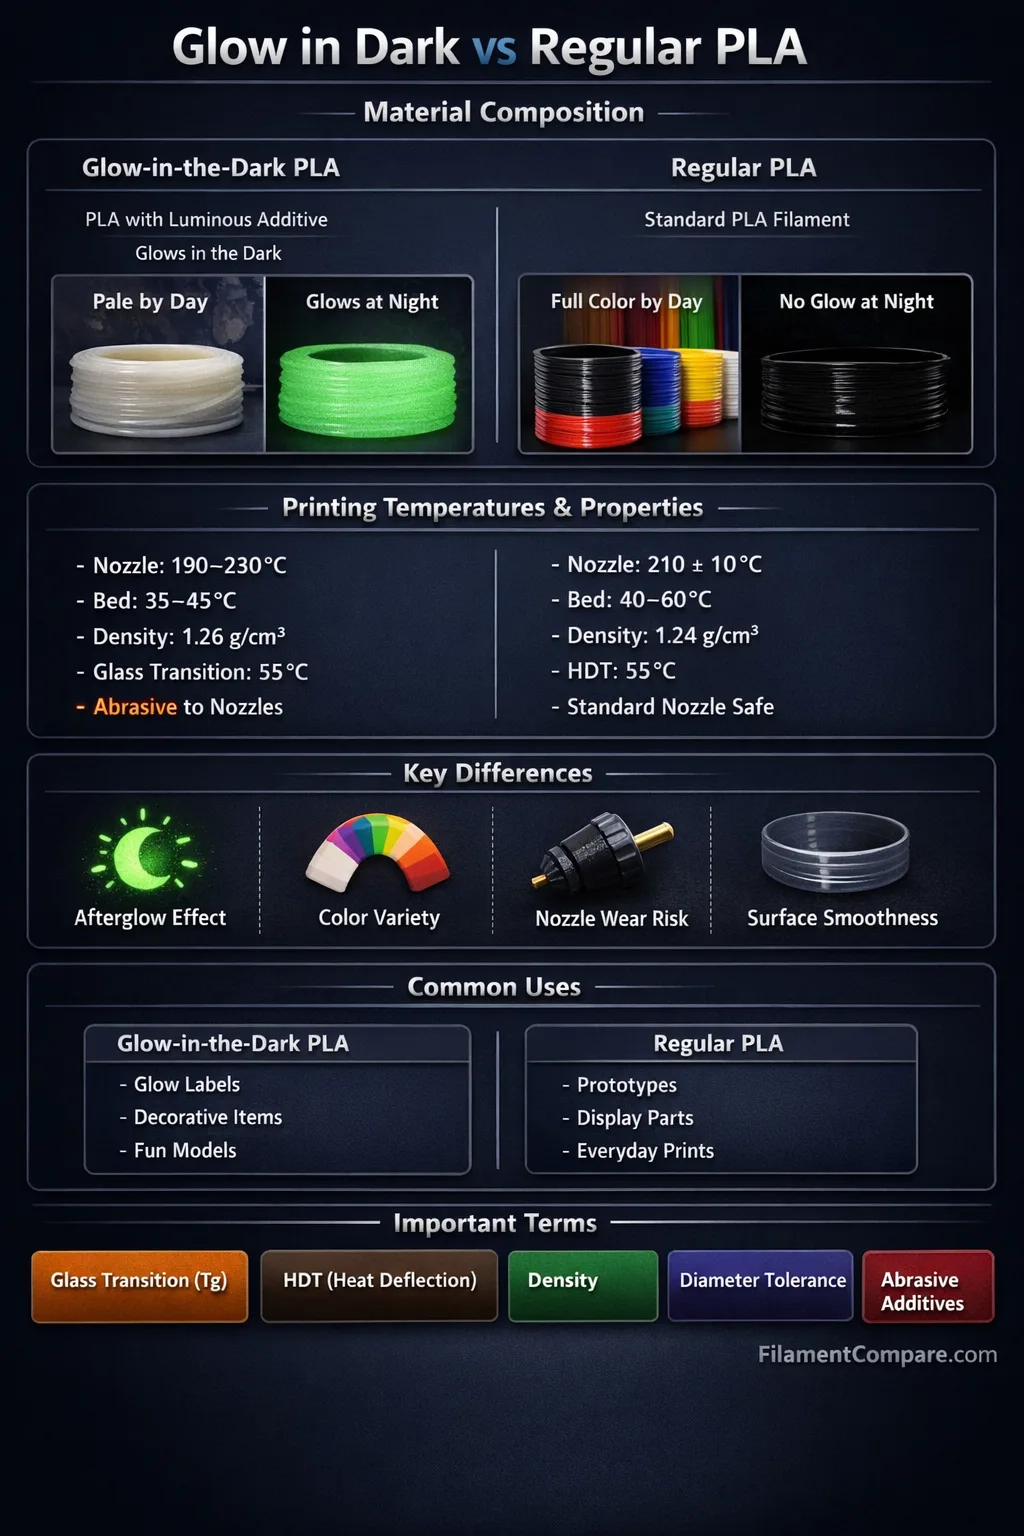
Glow-in-the-dark PLA uses a PLA-based formulation with photoluminescent particles, while regular PLA focuses on predictable color, fine detail, and low-maintenance printing. Both materials usually retain the low-warp behavior associated with PLA, but glow PLA adds nozzle wear, possible clogging concerns, and a lighting-dependent visual effect. Regular PLA is the practical default for most prints; glow PLA makes sense when nighttime visibility or a luminous finish is part of the design.
Choose glow-in-the-dark PLA for decorative signs, switches, labels, costume parts, astronomy accessories, emergency-location markers, and models intended to remain visible after the lights go out.
Choose regular PLA for prototypes, miniatures, dimensional test parts, everyday models, multicolor prints, and projects where detail, color selection, cost, and nozzle longevity matter more than luminosity.
Glow PLA is not a higher-performance replacement for regular PLA. It is a visual-effect PLA that requires more attention to nozzle hardware.
Best for Night Visibility
Glow PLA
Photoluminescent particles absorb light and release it gradually in darkness.
Best for Fine Details
Regular PLA
A standard formulation is usually easier to run through small nozzles and narrow extrusion paths.
Best for Brass Nozzles
Regular PLA
Unfilled PLA normally causes far less nozzle wear than particle-filled glow formulations.
Best for Signs and Markers
Glow PLA
Useful where lettering, arrows, handles, or control locations should remain visible temporarily in darkness.
Best Color Selection
Regular PLA
Available in a wider range of opaque, translucent, matte, silk, satin, and specialty finishes.
Best for Beginners
Regular PLA
Fewer hardware concerns make it the easier material for learning first-layer and extrusion calibration.
Best for Large Decorative Props
Glow PLA
Thicker visible sections can produce a more noticeable luminous effect than thin walls.
Best for Everyday Prototypes
Regular PLA
Usually lower in cost and more suitable for repeated test prints or rapid design revisions.
| Property | Glow-in-the-Dark PLA | Regular PLA | Practical Difference |
|---|---|---|---|
| Material Family | PLA-based compound with luminous particles | PLA or a brand-specific PLA blend | Both remain within the PLA family unless the spool states otherwise |
| Primary Purpose | Light-storing visual effect | General printing, models, prototypes, and decorative parts | Choose according to appearance rather than assuming better engineering performance |
| Print Difficulty | Easy to moderate | Usually easy | Glow particles add nozzle and clogging considerations |
| Typical Nozzle Temperature | Commonly about 190–230°C, brand-dependent | Commonly about 185–235°C, brand-dependent | Temperature ranges often overlap |
| Typical Bed Temperature | Often about 35–70°C, depending on formulation and build surface | Usually around 50–60°C, though some grades permit an unheated bed | Follow the spool profile rather than copying one universal value |
| Enclosure Need | Normally not required | Normally not required | An overly warm chamber may be unhelpful for either PLA type |
| Recommended Nozzle | Hardened steel, hardened alloy, ruby, or another wear-resistant option | Brass, stainless steel, or hardened nozzles can be used | Regular PLA places fewer demands on nozzle material |
| Nozzle Diameter | 0.4 mm is a practical minimum for many branded grades; 0.6 mm can improve reliability | 0.2, 0.25, 0.4, 0.6, and larger sizes may be used when supported by the printer | Regular PLA is better suited to very small nozzles |
| Nozzle Wear | Moderate to high during repeated use | Low with ordinary unfilled grades | Regular PLA is easier on brass hardware |
| Clogging Risk | Higher with small nozzles, residue, or dense particle loading | Usually low when dry and printed within the correct temperature range | Glow PLA benefits from a clean extrusion path |
| Fine Surface Detail | Good, but tiny details may be less consistent with coarse particles or larger nozzles | Usually very good | Regular PLA is the safer choice for miniatures and embossed text |
| Daylight Appearance | Often pale, muted, translucent, or lightly colored | Wide range of saturated colors and finishes | Glow performance and daytime color are separate design considerations |
| Darkness Appearance | Emits stored light for a limited period after charging | No photoluminescent effect unless another additive is present | Glow PLA is the clear choice for temporary dark visibility |
| Heat Resistance | Generally follows the limits of its PLA base unless the manufacturer states otherwise | Relatively low compared with PETG, ASA, ABS, PC, and engineering polymers | Glow additives do not automatically make PLA heat resistant |
| Toughness | Formulation-dependent | Formulation-dependent; standard PLA is usually stiff with limited flex before fracture | Do not assume that the glow grade is stronger or weaker without a datasheet |
| Dimensional Stability | Usually good when flow is calibrated | Usually good with low warping | Regular PLA may be easier to tune for tight tolerances |
| Moisture Behavior | Store dry; moisture can reduce surface quality and extrusion consistency | Store dry; wet filament can cause popping, stringing, or rough extrusion | Both benefit from sealed storage |
| Typical Uses | Night markers, signs, props, toys, stars, labels, knobs, and decorative inserts | Models, prototypes, organizers, miniatures, fixtures, and display parts | Function and visibility should drive the choice |
| Main Limitation | Abrasive particles and fading luminosity | Low heat tolerance and limited impact flexibility in many standard grades | Neither material is intended for every functional environment |
| Better Choice | Parts designed around a luminous effect | Most normal PLA applications | There is no universal winner |
Glow PLA Material Profile
- Polymer type: PLA-based compound with photoluminescent filler
- Print difficulty: Easy to moderate
- Nozzle range: Often around 190–230°C
- Bed range: Commonly around 35–70°C
- Enclosure: Usually unnecessary
- Hardware: Wear-resistant nozzle recommended; required by some manufacturers
- Drying need: Dry when popping, roughness, stringing, or brittle filament appears
- Typical behavior: Low warping with a rougher or more particle-filled extrusion character
- Best uses: Luminous labels, decorative models, switches, signs, and night-visible accents
Regular PLA Material Profile
- Polymer type: PLA or a modified commercial PLA blend
- Print difficulty: Usually easy
- Nozzle range: Commonly around 185–235°C
- Bed range: Often around 50–60°C
- Enclosure: Usually unnecessary
- Hardware: Standard brass nozzle is normally suitable
- Drying need: Dry when moisture-related defects become visible
- Typical behavior: Low warping, good dimensional accuracy, and clean surface detail
- Best uses: Prototypes, display parts, organizers, miniatures, and general models
The meter values are relative indicators for common printing decisions rather than fixed laboratory ratings. Results can shift with the manufacturer, luminous filler content, color, stored moisture, nozzle diameter, layer orientation, wall thickness, exposure light, and slicer profile.
What Makes Glow PLA Different?
Regular PLA receives its visible color from ordinary pigments or dyes. Glow PLA includes particles that absorb energy from a light source and release part of that energy as visible light after the source is removed. The effect is temporary, so a printed object gradually becomes dimmer and must be exposed to light again.
The luminous ingredient does not change the basic material into a new polymer family. Many commercial versions remain PLA-based and can be printed near familiar PLA temperatures. Polymaker, for example, places its Glow PLA within a family of PLA compounds intended for typical PLA settings[d].
The additive still changes the printing experience. Glow particles are harder than the brass used in many standard nozzles. As filament moves through the hotend, the particles can gradually enlarge or deform the nozzle opening. A worn nozzle may produce wider extrusion lines, inconsistent flow, softened corners, dimensional drift, and rough top surfaces.
Glow Color Is Not the Same as Daylight Color
A spool that glows green may appear pale green, cream, translucent, or nearly white under normal room lighting. Blue-glowing grades may also appear less saturated than ordinary blue PLA. Check both the daylight appearance and the charged appearance before choosing a filament for a visible exterior surface.
Nozzle Wear, Diameter, and Clogging
The hardware difference is more important than the small overlap in printing temperatures. Bambu Lab lists a 190–230°C nozzle range and a 35–45°C bed range for its PLA Glow, requires a hardened steel nozzle, and advises against a 0.2 mm nozzle[a]. Those instructions are product-specific, but they illustrate why glow filament should not be treated exactly like plain PLA.
A brass nozzle may complete a small glow print, yet visible wear can develop much faster than it would with regular PLA. The rate depends on filament quantity, particle hardness, nozzle geometry, printing temperature, extrusion pressure, and the particular brass alloy. Wear is cumulative. A nozzle that still extrudes material may already have lost the dimensional accuracy expected from its marked diameter.
0.2 mm Nozzle
Better reserved for unfilled regular PLA. Glow particles raise the chance of restricted flow or clogging.
0.4 mm Nozzle
A practical choice for many branded glow PLAs when the nozzle is wear-resistant and the filament profile is tuned.
0.6 mm Nozzle
Offers a wider extrusion path and can improve reliability, though very small text and surface detail become less refined.
Before loading glow PLA, remove residue from previous high-temperature, wood-filled, metal-filled, or carbon-filled materials. A partial blockage that regular PLA can pass through may become more noticeable when a particle-filled filament is introduced. Purging with ordinary PLA after the glow print can also reduce the amount of luminous residue left in the melt zone.
Glow Strength, Charging, and Model Geometry
Glow performance depends on more than the filament brand. The light source, charging duration, pigment concentration, glow color, wall thickness, infill visibility, and viewing conditions all affect the result. A brief exposure to weak indoor lighting may produce only a mild effect. A stronger light source generally creates a brighter initial glow.
The brightness is highest soon after charging and then falls. Glow PLA should therefore be viewed as a temporary location or decorative effect, not as a replacement for powered emergency lighting, certified safety signage, reflective tape, or an electronic indicator.
Design Choices That Improve the Visible Effect
- Use the glow material on exterior walls rather than hiding it behind opaque PLA.
- Give luminous lettering enough stroke width to remain visible after slicing.
- Use thicker shells where the design permits more glowing material.
- Test the part after charging under the same darkness level expected in use.
- Place glow regions beside dark or opaque regions to create visual contrast.
- Use raised or recessed luminous symbols instead of very thin engraved lines.
More infill does not always produce a matching increase in visible brightness because internal material may be hidden by the outer walls. Increasing wall count or making the luminous feature physically thicker is often more useful than filling an entire model with glow PLA. A test coupon can prevent wasting a full spool on a geometry that looks bright in the slicer but weak after printing.
Mechanical and Thermal Limits
Glow particles do not automatically improve tensile strength, impact resistance, layer adhesion, stiffness, or heat tolerance. The base resin and modifier package still control much of the mechanical behavior. Pigment quantity can also alter flow and bonding, so two glow PLAs may perform differently even when both are sold under the same general material name.
Regular PLA is known for stiffness, good printed detail, and low warping, but many standard formulations have limited heat tolerance. UltiMaker reports a heat-deflection value of 58.8 ± 0.4°C for its own tested PLA under the stated test condition[c]. That number should not be assigned to every PLA or glow PLA, but it shows why a PLA-based part may deform in a hot vehicle, beside a heater, near a lamp enclosure, or under sustained load in warm conditions.
When the part must carry a load, retain a tight fit, or resist repeated impact, choose the filament from a product datasheet rather than from the glow label. A standard PLA with documented mechanical data may be more predictable than a decorative glow grade with no published test results. PETG, ASA, ABS, nylon, or polycarbonate may fit demanding environments better, depending on printer capability and exposure conditions.
Heat note: A luminous effect does not make a PLA part suitable for higher temperatures. Treat glow PLA as ordinary PLA unless its manufacturer provides separate thermal data for that exact formulation.
Print Settings and Surface Quality
Start with the manufacturer profile. Generic PLA settings are a useful baseline only when the spool provides no better information. Official material tables commonly place regular PLA near 185–235°C with a bed around 50–60°C, while also distinguishing glow materials by their hardened-nozzle requirement[b].
Glow PLA may benefit from a modest reduction in speed if the extruder begins clicking, extrusion lines become inconsistent, or small features show under-extrusion. Raising temperature should not be the first automatic response. Confirm that the nozzle is clean, the filament is dry, the spool turns freely, and the volumetric flow demand is reasonable.
Glow PLA Starting Approach
- Install a wear-resistant 0.4 or 0.6 mm nozzle.
- Use the spool temperature range.
- Begin with moderate outer-wall and volumetric speeds.
- Run flow calibration when dimensional accuracy matters.
- Use strong part cooling after the first layers unless the brand states otherwise.
- Inspect the nozzle after extended glow printing.
Regular PLA Starting Approach
- Use the printer’s tested PLA profile.
- A clean brass 0.4 mm nozzle is normally sufficient.
- Calibrate first-layer height and extrusion flow.
- Use normal PLA cooling and bridge settings.
- Reduce speed for tiny features or glossy surfaces.
- Check spool-specific temperature guidance for matte, silk, or high-speed blends.
FormFutura lists 190–230°C at the nozzle and 50–70°C at the bed for its EasyFil PLA Glow in the Dark, while describing those values as guidance for finding an appropriate profile[e]. This is a useful reminder that bed recommendations can vary even when nozzle ranges appear similar.
Storage, Drying, and Spool Handling
Both materials should be stored in a sealed container or bag with active desiccant. PLA may continue to print after absorbing some moisture, but surface quality and extrusion stability can decline before the spool appears unusable. Audible popping, steam, excess stringing, rough walls, inconsistent gloss, or unusually brittle filament are common reasons to investigate moisture.
Use the filament manufacturer’s drying guidance when available. Excessive drying temperature can deform PLA on the spool, fuse adjacent turns, or cause feeding resistance. The dryer display may also differ from the actual air temperature around the filament, so conservative settings are preferable when the spool has no documented drying range.
Glow filament may feel rougher than regular PLA because of its particle content. Keep the spool path smooth and avoid tight bends where the filament rubs heavily against guides, tubes, feeder entrances, or automatic material-system components.
| Print Scenario | Better Fit | Reason |
|---|---|---|
| Beginner calibration cube | Regular PLA | Reduces hardware variables while first-layer, flow, and temperature settings are learned. |
| Night-visible light-switch plate | Glow PLA | The luminous face can help locate the switch after the room becomes dark. |
| Miniature with fine facial detail | Regular PLA | Better suited to small nozzles and narrow extrusion features. |
| Decorative stars or ceiling shapes | Glow PLA | The design is built around stored-light visibility. |
| Dimensional prototype | Regular PLA | Ordinary PLA is easier to calibrate without abrasive filler affecting the nozzle. |
| Cosplay accent or prop symbol | Glow PLA | Provides a luminous surface without wiring or batteries. |
| Large batch of organizers | Regular PLA | Usually lower in cost and easier on standard nozzle hardware. |
| Emergency-equipment location marker | Glow PLA, with limitations | May provide temporary supplemental visibility but does not replace certified signage or powered lighting. |
| Outdoor garden label | Neither by default | Standard PLA formulations have limited heat and long-term weather tolerance; evaluate ASA or a UV-stabilized material. |
| Hot car accessory | Neither by default | A parked vehicle may exceed the comfortable service range of ordinary PLA-based parts. |
| Multicolor display model | Regular PLA | Provides broader color matching and fewer abrasive-material changes. |
| Dark-room orientation arrows | Glow PLA | Wide luminous arrows can remain visible for a limited time after charging. |
| 0.2 mm nozzle lithophane | Regular PLA | Glow particles can increase clogging risk in a very small nozzle. |
| Planetarium or astronomy model | Glow PLA accents | Selected stars, paths, labels, or celestial features can be highlighted without printing the entire model in glow material. |
Choose Glow PLA When
- The luminous effect is part of the object’s function or appearance.
- You have a hardened or otherwise wear-resistant nozzle.
- The design uses broad symbols, lettering, stars, arrows, or visible exterior walls.
- Temporary dark visibility is sufficient.
- You can test charging behavior under the intended lighting conditions.
- A pale or muted daylight color fits the design.
Glow PLA Is Less Suitable When
- You only have a brass nozzle and do not want accelerated wear.
- The print requires a 0.2 mm nozzle or extremely fine extrusion paths.
- The part must remain continuously illuminated without recharging.
- Published mechanical properties are required for an engineering decision.
- The application involves high heat, sustained outdoor exposure, or certified safety signage.
- Exact color matching under normal light matters more than darkness visibility.
Choose Regular PLA When
- You need an easy material for general desktop printing.
- Fine text, miniature detail, or narrow nozzle use is required.
- You want to use an ordinary brass nozzle.
- The project needs a particular color, opacity, or surface finish.
- You expect to print many prototypes or repeated revisions.
- Predictable dimensional calibration is more useful than a special visual effect.
Regular PLA Is Less Suitable When
- The part must be visible after the lights are removed.
- The design depends on photoluminescent markings.
- The part will face temperatures near or above the tested heat-deflection range of the chosen grade.
- Repeated impacts, bending, or snap-fit movement require a tougher material.
- Long-term sunlight and weather exposure are expected without a suitable protective design.
Material Selection Matrix
Choose glow-in-the-dark PLA if the print needs temporary luminosity and you are prepared to use a wear-resistant nozzle, avoid very small nozzle sizes, and test the completed geometry after charging.
Choose regular PLA if you need a general-purpose filament for detailed, low-warp, affordable, and repeatable printing with standard hardware.
Use both in one model if only selected labels, symbols, edges, or decorative regions need to glow. This approach reduces abrasive-filament use and preserves regular PLA for the larger structural or colored sections.
Neither replaces the other. Regular PLA is the broader material choice, while glow PLA is a purpose-driven visual variant.
Glow PLA and Regular PLA Questions
Does glow-in-the-dark PLA require a hardened nozzle?
A wear-resistant nozzle is strongly recommended for repeated use, and some manufacturers list it as required. The luminous filler can abrade brass and gradually change the nozzle opening.
Can glow PLA be printed with a 0.2 mm nozzle?
It is not the preferred choice. Particle-filled filament has less room to pass through a 0.2 mm opening, raising the chance of clogging or irregular extrusion. A hardened 0.4 mm nozzle is a more practical starting point, while 0.6 mm can improve flow reliability.
Does glow PLA remain bright all night?
No. The material releases stored light after charging, then becomes progressively dimmer. Brightness and duration vary with the formulation, glow color, charging source, exposure time, material thickness, and surrounding darkness.
Is glow PLA stronger than regular PLA?
Not necessarily. The luminous additive does not establish tensile strength, impact resistance, stiffness, or layer adhesion by itself. Use product-specific test data when mechanical performance matters.
Can glow PLA and regular PLA be used in the same print?
Usually, provided their temperature ranges and layer-bonding behavior are compatible. Test the exact brands before a long multicolor print because modified PLA formulations can bond differently at material-change boundaries.
Does glow PLA need sunlight to charge?
No. Many light sources can charge photoluminescent material, although brightness and charging speed differ. Test the actual lamp, exposure distance, and charging time planned for the printed object.
Technical Resources Used
- [a] PLA Glow | Bambu Lab EU Store (Used for Bambu PLA Glow nozzle material, nozzle diameter, nozzle temperature, and bed temperature guidance.)
- [b] Filament Material Guide | Prusa Knowledge Base (Used for common regular PLA temperature ranges and the hardware distinction between ordinary PLA and glow-in-the-dark material.)
- [c] PLA 3D Printing Material | UltiMaker (Used for tested PLA dimensional, surface, mechanical, and heat-deflection information. The published values apply to UltiMaker’s tested formulation and conditions.)
- [d] Panchroma | Polymaker (Used to confirm that the manufacturer’s Glow PLA is part of its PLA compound family and is intended for typical PLA-style printing settings.)
- [e] EasyFil PLA – Glow in the Dark | FormFutura (Used for an additional official glow PLA nozzle and bed temperature range, showing the variation between commercial formulations.)
